Accessing your Clover Dashboard fast and securely matters more than you might think. When you log in, you unlock features that streamline payment security, boost administrative efficiency, and simplify operational management. Take a look at the table below to see how secure and efficient dashboard access supports your business every day:
| Impact Area | Description |
|---|---|
| Payment Security | Mobile payment acceptance enhances security through PCI compliance, protecting sensitive transaction data. |
| Administrative Efficiency | Reduces paperwork and administrative tasks, allowing quicker access to funds and optimizing cash flow. |
| Operational Management | Centralizes business management tasks like employee management and sales reporting into one dashboard. |
Log In to Clover Dashboard

When you see the phrase "How to Log In and Access Your Clover Dashboard Account," you might wonder what it really means for your business. In simple terms, this process lets you reach the heart of your Clover system, where you can manage sales, employees, inventory, and reports—all from one secure place. Logging in gives you full control over your business operations, whether you’re at your desk or on the go.
If you want to access your account quickly and safely, you need to follow a few straightforward steps. The process is designed to keep your information secure while making sure you can get to your dashboard whenever you need it. Let’s walk through each step so you can log into your Clover dashboard with confidence.
Access Login Page
The first step to log into your Clover dashboard is to reach the official login screen. You want to make sure you’re on the right website to protect your business data. Here’s how you do it:
- Open your preferred web browser.
- Type https://pos.clover.com into the address bar and press Enter.
- Wait for the login screen to load. You should see fields for your username and password.
If you use Clover on your mobile device, you can also access your account through the Clover Go app, available for both iOS and Android. The app uses the same login details as the web portal, so you don’t need to remember extra information.
Tip: Always double-check the URL before you enter your username or password. This helps you avoid phishing scams and keeps your account safe.
Enter Credentials
Once you reach the login screen, you’ll need to enter your credentials. This step is all about security and making sure only authorized users can access your Clover dashboard.
- Enter your registered business email address as your username.
- Type your secure password in the password field.
- Click the Sign In button to log into your Clover account.
If you have two-factor authentication enabled, you’ll be prompted to enter a code sent to your phone or email. This extra step adds another layer of protection for your account.
Clover uses advanced security features like reCAPTCHA to keep your account safe. Sometimes, you might see a checkbox that says “I’m not a robot,” or you may need to solve a quick puzzle. These steps help block automated bots from trying to log into your account.
Security Reminder: Use a strong password with at least 12 characters, including uppercase and lowercase letters, numbers, and symbols. Don’t save your credentials on public computers, and always log out when you’re done.
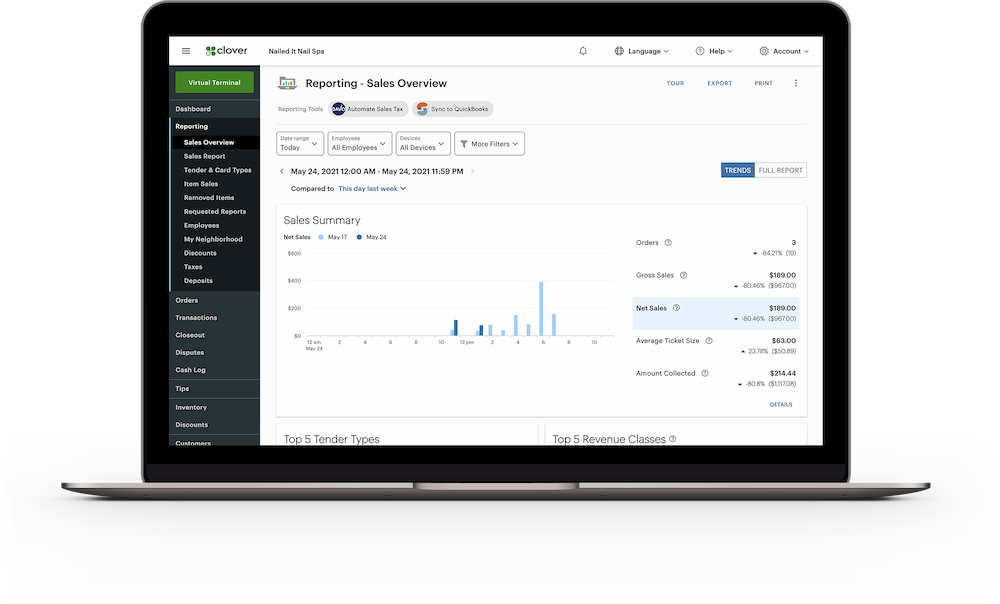
Dashboard Overview
After you log into your Clover dashboard, you’ll land on the homepage. This is where you can see everything that matters to your business at a glance. The dashboard is designed to be user-friendly, so you can find what you need without any hassle.
Here’s a quick look at what you’ll find on your dashboard:
| Feature | Description | Impact on Business |
|---|---|---|
| Sales Analytics | Real-time transaction monitoring | Immediate identification of sales trends |
| Inventory Management | Automated stock level tracking | Reduction in stockouts and overstock situations |
| Employee Management | Role-based access and performance metrics | Improved staff accountability and scheduling |
| Reporting Suite | Customizable business intelligence reports | Data-driven strategic planning capabilities |
You can use these features to track sales, manage inventory, oversee employees, and generate reports. Each tool is just a click away after you log into your Clover dashboard.
Note: For the best experience, update your password every 60-90 days and enable two-factor authentication. This keeps your account secure and your business running smoothly.
Now you know how to log into your Clover dashboard, access your account, and start using the powerful tools available to you. With these steps, you can manage your business confidently and securely.
Reset Password on Clover Dashboard
Sometimes you just can’t remember your password, or maybe you’re having trouble logging in. Don’t worry—resetting your Clover password is a straightforward process. If you ever find yourself locked out, you can get back into your account quickly by following a few simple steps. This section will guide you through what to do if you forget your password and how to update your security information to keep your account safe.
Forgot Password Steps
You might need to reset your password for a few reasons. Most people forget their password or have trouble logging in after too many failed attempts. If this happens, you can recover access to your Clover account by following these steps:
- Go to the Clover Dashboard at www.clover.com.
- Select the 'Forgot password?' link on the login page.
- Enter the email address you use as your username.
- Submit your request to receive a password reset link.
- Check your email inbox for a message from Clover. If you don’t see it, look in your spam or junk folder.
- Open the email and follow the instructions to create a new password.
- If you still don’t receive the email, reach out to Clover support for help.
Tip: Always use a strong, unique password when you reset it. This helps protect your business information and keeps your account secure.
Update Security Info
After you reset your password, take a moment to review your security settings. Make sure your recovery email and phone number are up to date. This makes future password resets easier and keeps your account protected. You can update your security info from your Clover dashboard once you log in. Keeping your details current means you’ll always have a way to recover your account if you forget your password again.
Note: Regularly updating your security information is a smart habit. It ensures you stay in control of your Clover account and reduces the risk of unauthorized access.
Access Clover Dashboard on Devices

You want to get the most out of your Clover dashboard, no matter where you are or what device you use. When you understand how to log in and access your Clover Dashboard account from different platforms, you can manage your business with more flexibility and speed. This section shows you how to reach your dashboard from a web browser, a Clover device, or your mobile app, and how you can take your analytics even further with FineBI.
Web Browser
Most people start with the web version of the Clover dashboard. You get the full set of features and the best experience here. To access your account, open your browser and go to the official login page. For the smoothest experience, use one of the supported browsers:
| Browser | Status |
|---|---|
| Google Chrome | Recommended |
| Mozilla Firefox | Latest |
| Other recent browsers | Not supported or recommended |
You’ll see all your business data, reports, and tools in one place. The web dashboard works best for in-depth tasks like detailed reporting or managing employees.
Clover Device Login
If you’re on-site, you can log in to your Clover dashboard directly from a Clover device. Here’s how:
- Open the Setup app.
- Tap the menu in the upper left corner.
- Select Clover Dashboard.
This method lets you process sales and update inventory in real time. You reduce manual errors and respond quickly to customer needs.
Mobile App
Need to check your dashboard on the go? The Clover mobile app is perfect for quick updates and urgent tasks. While it doesn’t have every feature of the desktop version, it’s great for checking sales or inventory fast.
| Feature | Mobile App | Desktop Version |
|---|---|---|
| Feature Availability | Lacks certain features | Full feature set available |
| Recommended Use | Quick checks and urgent tasks | Complex tasks |
You can switch between devices as needed, which helps you stay connected to your business at all times.
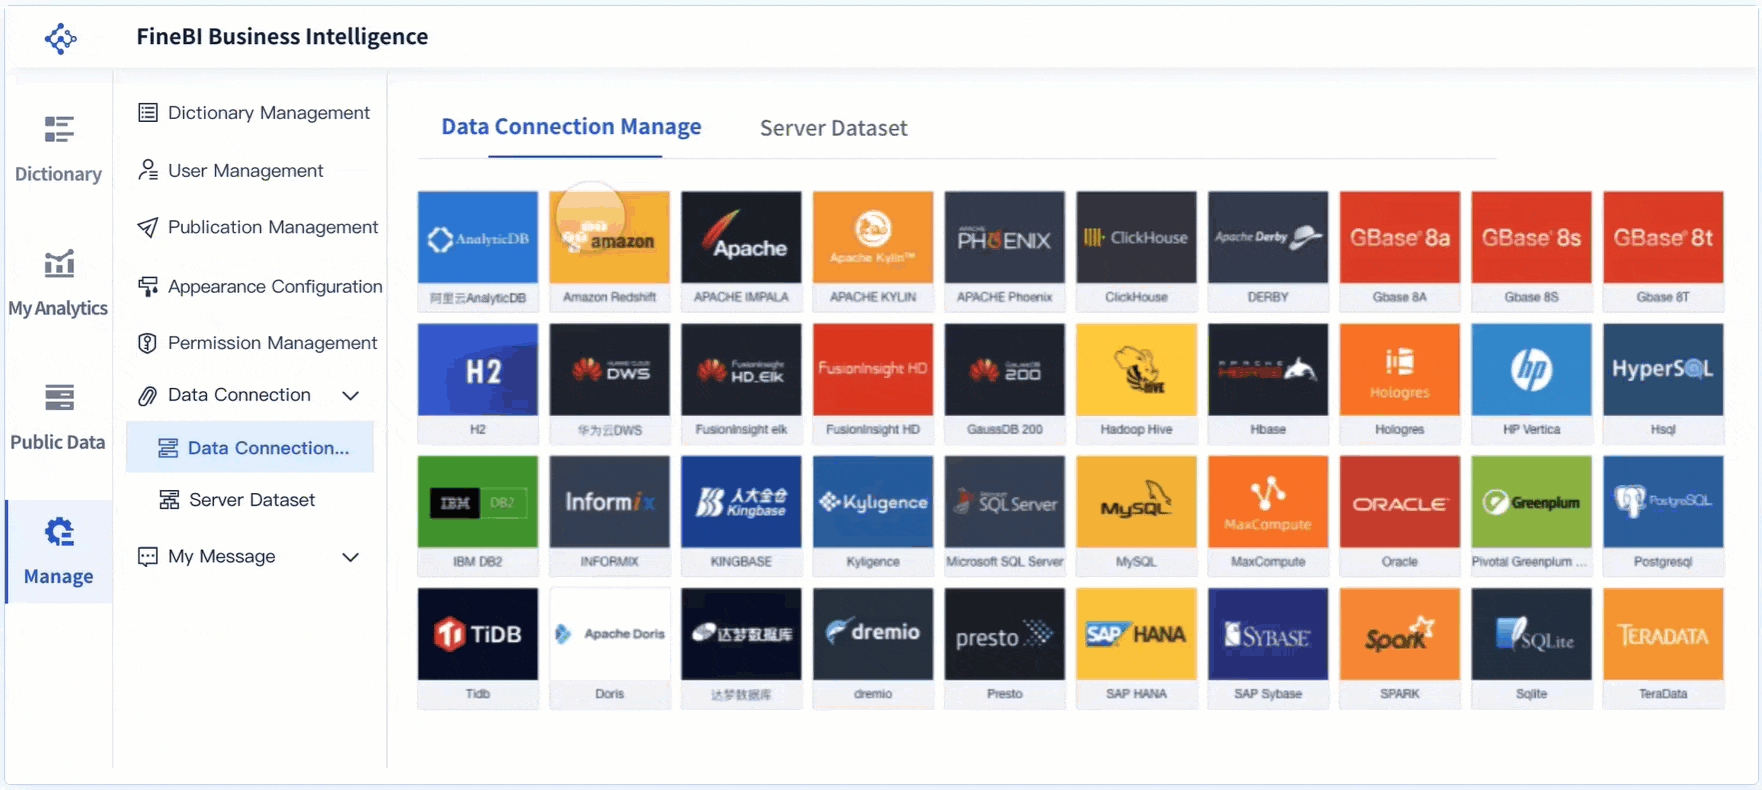
FineBI Integration
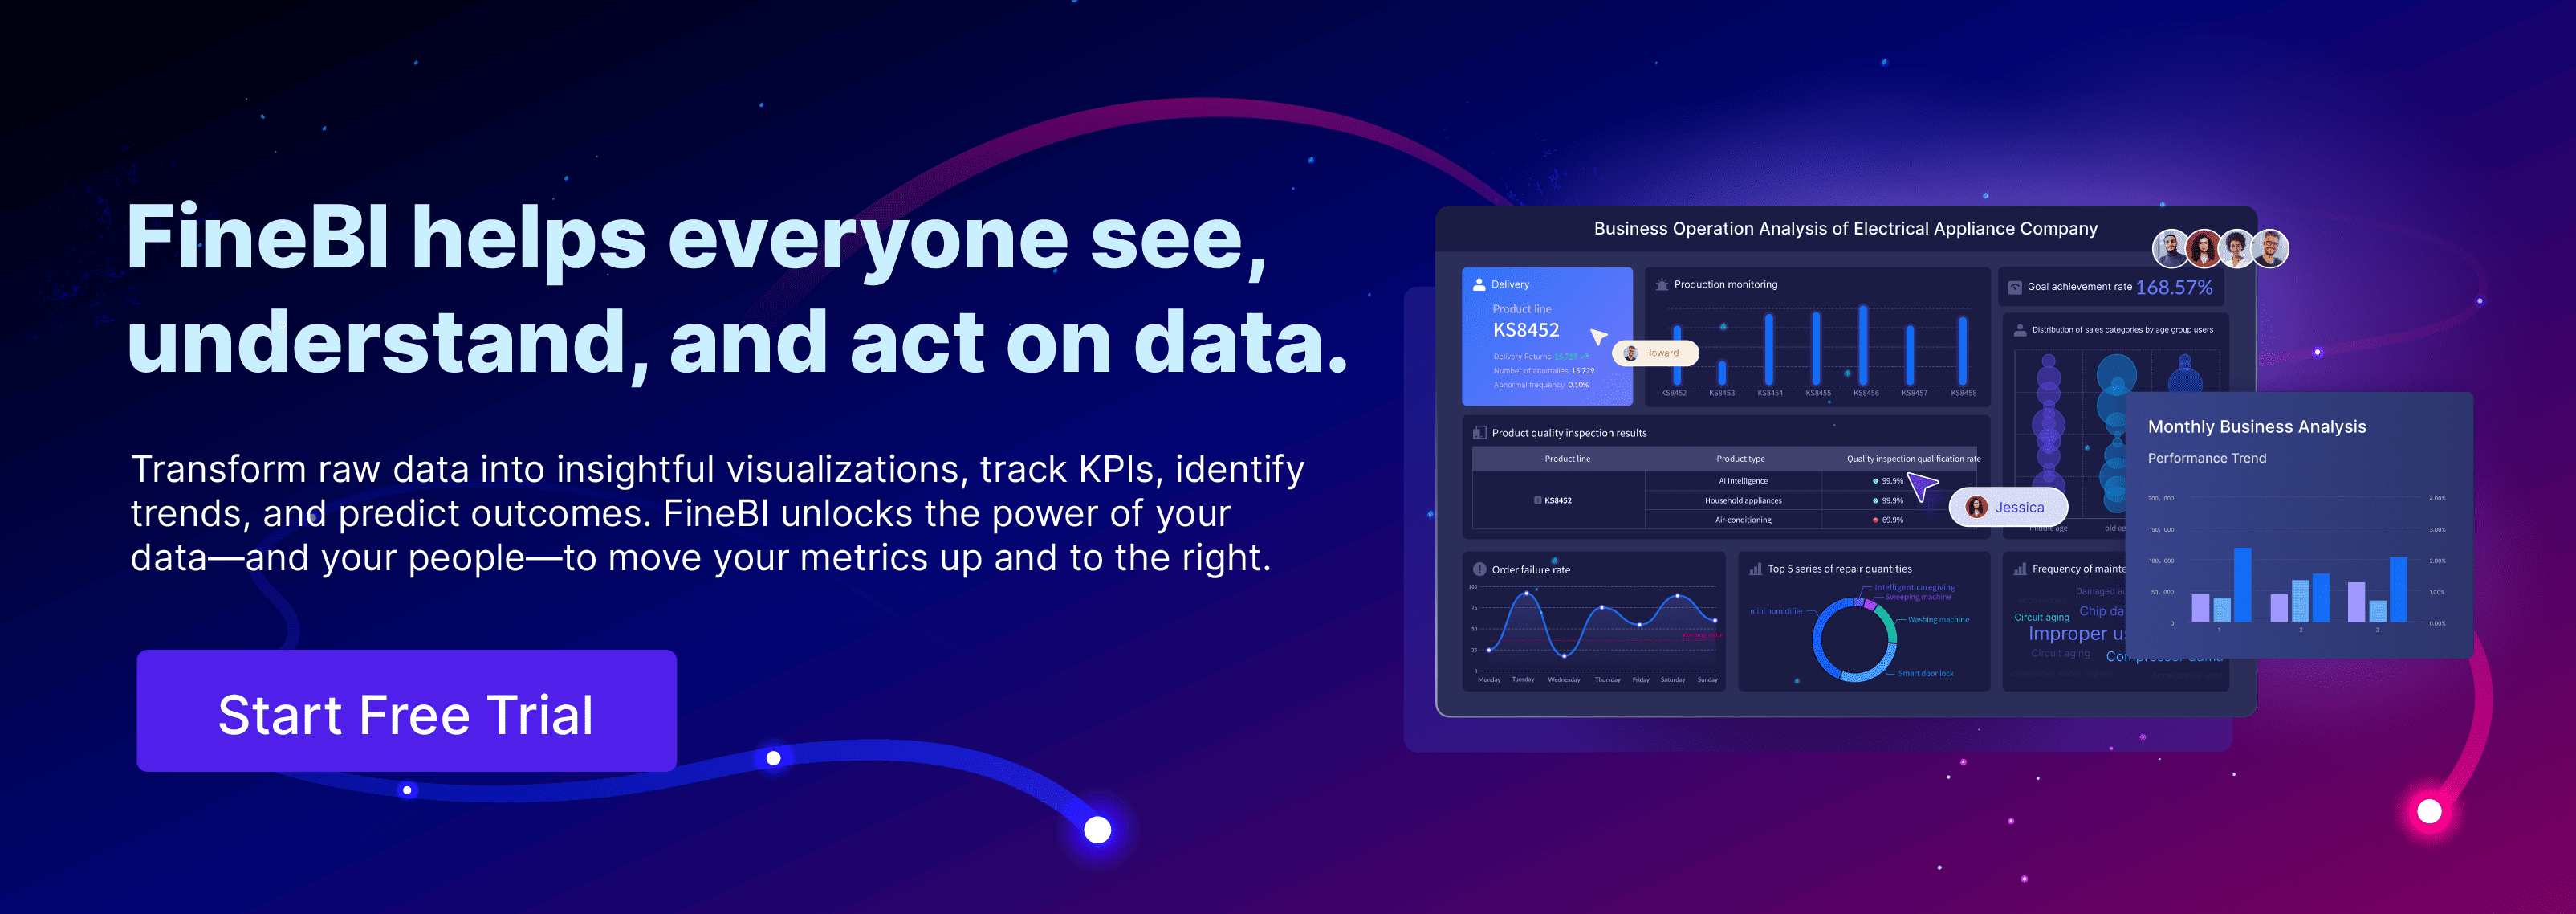
If you want to go beyond the basics, FineBI can help you unlock deeper insights from your Clover dashboard data. FineBI connects to your data sources and lets you build interactive dashboards with drag-and-drop tools. You get real-time analytics, advanced visualizations, and the ability to share reports securely with your team. Unlike the standard Clover dashboard, FineBI offers more customization, richer chart types, and AI-driven insights. This means you can track KPIs, spot trends, and make smarter decisions faster. FineBI also adapts to any device, so you can analyze your business wherever you are.
Tip: FineBI is ideal if you need advanced analytics, want to combine data from multiple sources, or require enterprise-level reporting.
Troubleshoot Clover Dashboard Login Issues
When you think about How to Log In and Access Your Clover Dashboard Account, you expect a smooth process. Sometimes, though, you might run into problems that keep you from reaching your dashboard. This section helps you understand what to do when you cannot log into your clover dashboard or your sales terminal. You will learn how to fix common login issues, check device compatibility, and reach out for help if you need it.
Common Errors
You might face a few typical problems when you try to log into your clover account or sales terminal. Here are the most frequent issues and how you can solve them:
- Forgotten Password: If you forget your password, use the 'Forgot Password' link on the login page. You will get an email with steps to reset your password and regain access to your account.
- Account Lockouts: Too many failed login attempts can lock you out. Wait about 15 minutes before you try again. If you still cannot log into your sales terminal, contact clover support for help.
- Browser Compatibility: Sometimes, your browser causes trouble. Make sure you use an updated browser. Clear your cache and enable JavaScript for the best experience when you log into your dashboard.
Tip: Always double-check your username and password before you try to log into your sales terminal. This simple step can save you time.
Device Compatibility
Your sales terminal works best with supported devices and browsers. If you have trouble logging in, check that your device meets the requirements. Use the latest version of Google Chrome or Mozilla Firefox for the web dashboard. If you use a mobile sales terminal, update your app to the newest version. Outdated software can block you from logging into your clover dashboard or sales terminal.
Note: If you use FineBI for advanced analytics, make sure your device supports its integration. FineBI helps you analyze data from your clover dashboard and sales terminal, so you can spot trends and fix issues faster.

Support Contacts
If you still cannot log into your clover account or sales terminal, reach out to clover support. You have several ways to get help:
- Use the live chat option at the bottom right of the support page.
- Send an email to [email protected].
- Schedule a call with a support agent.
Support teams can help you reset your account, fix login problems, and answer questions about your sales terminal or dashboard. Do not hesitate to contact them if you need extra help.

You now know how to log in and access your clover dashboard with confidence. Here’s a quick recap of the main steps:
- Log in to your clover dashboard.
- Open the Inventory app.
- Explore the menu options to add, edit, or update items.
Most login issues get resolved by following this guide. You can reset your password, check your credentials, or reach out for help if needed. For deeper insights, FineBI offers real-time data access, self-service analytics, and comprehensive data integration, making your dashboard even more powerful. If you still face connectivity problems or device errors, contact Clover support for assistance.
Continue Reading About Dashboard
How to Quickly Build a Core App Dashboard
Store Performance Dashboard: Your Retail Command Center
Dynamic Dashboard: A Game Changer for Data Analysis
Master the Square Dashboard in Easy Steps
How to Design a Client Dashboard That Delivers Results
Draft Dashboard Review - Is It the Ultimate DFS Tool?
Mastering the Blooket Dashboard for Optimal Classroom Engagement
Mastering the Twitch Dashboard for Streamer Success


FAQ

The Author
Lewis
Senior Data Analyst at FanRuan
Related Articles

How to Build an Investment Portfolio Reporting Dashboard for Executives: KPIs, Benchmarks, and Drill-Down Views
Investment portfolio reporting for executives is not about showing every holding, transaction, and chart your investment team can produce. It is about giving CEOs, CFOs, CIOs, boards, and investment committees a fast, re
Yida YIn
Jun 25, 2026

12 KPI Reporting Examples for Executive Dashboards: What to Show in Weekly, Monthly, and Quarterly Reviews
Executive leaders do not need more data. They need decision ready $1 examples that match how often they review the business and what actions they are expected to take. A weekly $1 should surface fast moving risks and per
Yida YIn
Jun 25, 2026

How to Build a Digital Marketing Reports Dashboard: Executive Examples, KPIs, and Templates
A $1 is the control layer that helps executives and marketing leaders turn scattered channel data into fast, confident decisions. If you are a CEO, CMO, operations director, or marketing analytics lead, the real problem
Yida Yin
May 07, 2026